在开发后管系统的需求中,有几个需求点记录下.开始的时候,没有想到解决方法,后来跟同事讨论了下,然后尝试了下可以啦.特此记录一下,使用之前的发布平台发布这篇文字有问题,所以就在这个网站上面发布啦~.
之前有发布过两篇其他问题的小计总结,这里是继续记录的第三篇,之前两篇点此直达:
Antd组件使用过程中相关问题记录(一)
React+Antd+Umi相关组件问题总结小计(二)
下拉选择多选,鼠标放上去可以悬浮显示所有

在使用Form.Item的时候,我们在里面的子元素只能有一个的.如果有多个,就无法通过form.getFieldsValue()拿到表单字段对应的值.
这时我们就可以通过自己写对应的onChange事件监听对表单进行设置值.提交的时候就可以拿到值啦.
 const formatProText = (text) => {
    const textArr = text?.indexOf(',') > 0 ? text.split(',') : [text]
    return textArr.map((item, index) => {
      return <p key={index} style={{ marginBottom: 8 }}>{item}</p>;
    })
  }
 <LineFormItem
     label="角色"
      name="roleCodes"
  >
<Tooltip title={tooltipRoleNames && tooltipRoleNames.length > 0 && formatProText(tooltipRoleNames.join(','))}>
    <Select
          placeholder="请选择角色"
          className={styles.hdInput}
          mode="multiple"
          maxTagCount="responsive"
          labelInValue={true}
          onChange={(val) => {
                console.log(val);
                setTooltipRoleNames(val && val.length > 0 && val.map(item => item.label))
        form.setFieldsValue({
             roleCodes: val && val.length > 0 && val.map(item => item.value)
                    })
                }}
        allowClear
   >
    {
        rolesOrgArr?.map((item) => {
                          return (
                            <Option key={item.roleCode} value={item.roleCode}>{item.roleName}</Option>
                          )
             })
          }
       </Select>
     </Tooltip>
 </LineFormItem>
鼠标悬浮上去,就可以展示对应所有选择的项啦.
文本框右侧有额外的内容,例如弹框选择线索,然后赋值文本框
其实这种展示antd官网中Form.Item相关的API是有的.我们可以通过extra来设置对应的额外信息.可以传对应的ReactNode即可

对应的代码如下:
  <Form.Item
        label="测试"
        name="test"
        style={{ position: 'relative' }}
        extra={
            <Button name="btn" type='default' style={{ position: 'absolute', left: '200px', top: 0 }}>
              其他内容
            </Button>
          }
    >
        <Input placeholder='请输入' onChange={(e) => {
            console.log(e.target.value);
            form.setFieldsValue({
              test: e.target.value
            })
          }
          }
        />
</Form.Item>
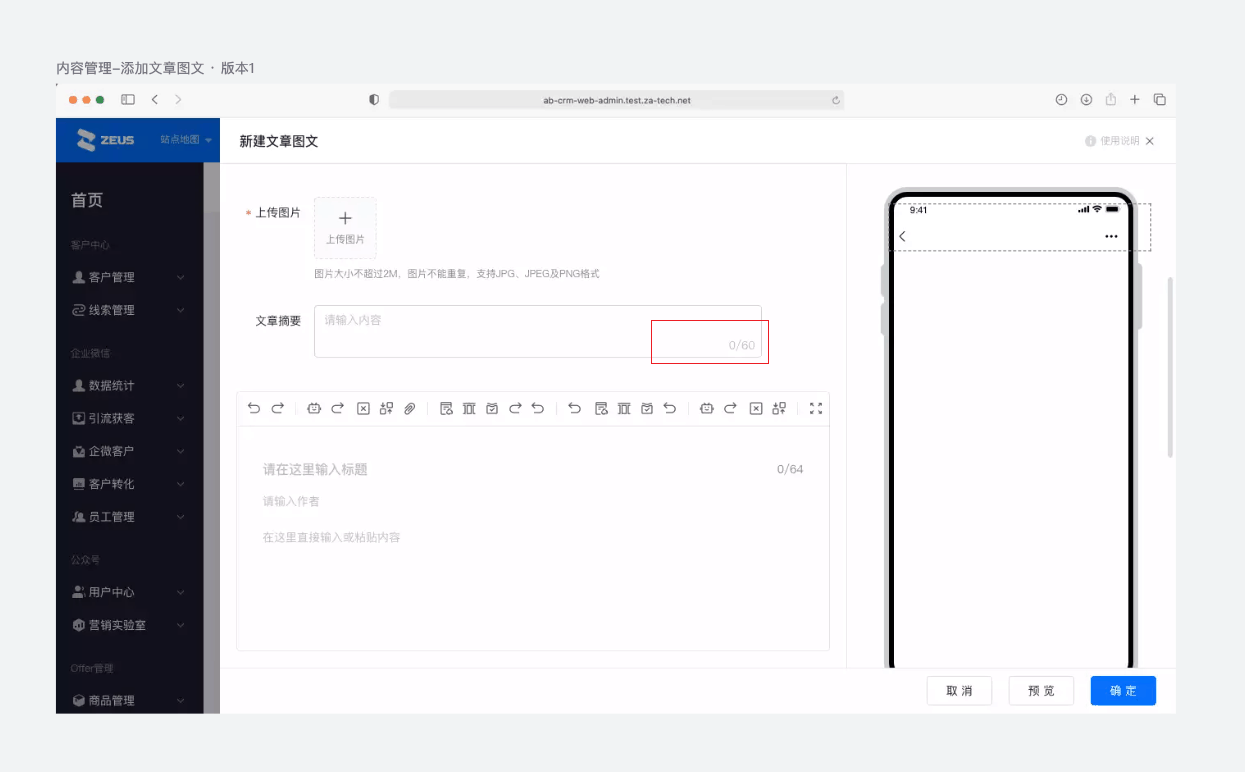
对于Input/Input.TextArea输入框展示对应的输入字符/最大字符数
看了下antd的官网,这个属性是在4.18.0的版本后新增了showCount属性支持的.其实对于之前的版本,不支持也是有方法可以处理的.也就是我们自己写对应的onChange事件,然后计算字符串的长度和定义的总长度进行对比即可.
<div style={{ position: 'relative' }}>
    <Form.Item
        label="填写标题"
        name="title"
        className="inputTextAreaCunstomStyle"
        rules={[
          {
            required: true,
            message: '请填写标题',
          },
        ]}
      >
          <Input.TextArea
            maxLength="32"
            autoSize
            onChange={e => {
                    setSubmitData({ ...submitData, title: e.target.value });
                  }}
                />
              </Form.Item>
              <span className={styles.limitNumber}>
                {submitData?.title?.length || 0}/32
              </span>
</div>
另外对于设计稿样式不一致的,我们可以用css单独的处理下样式即可.

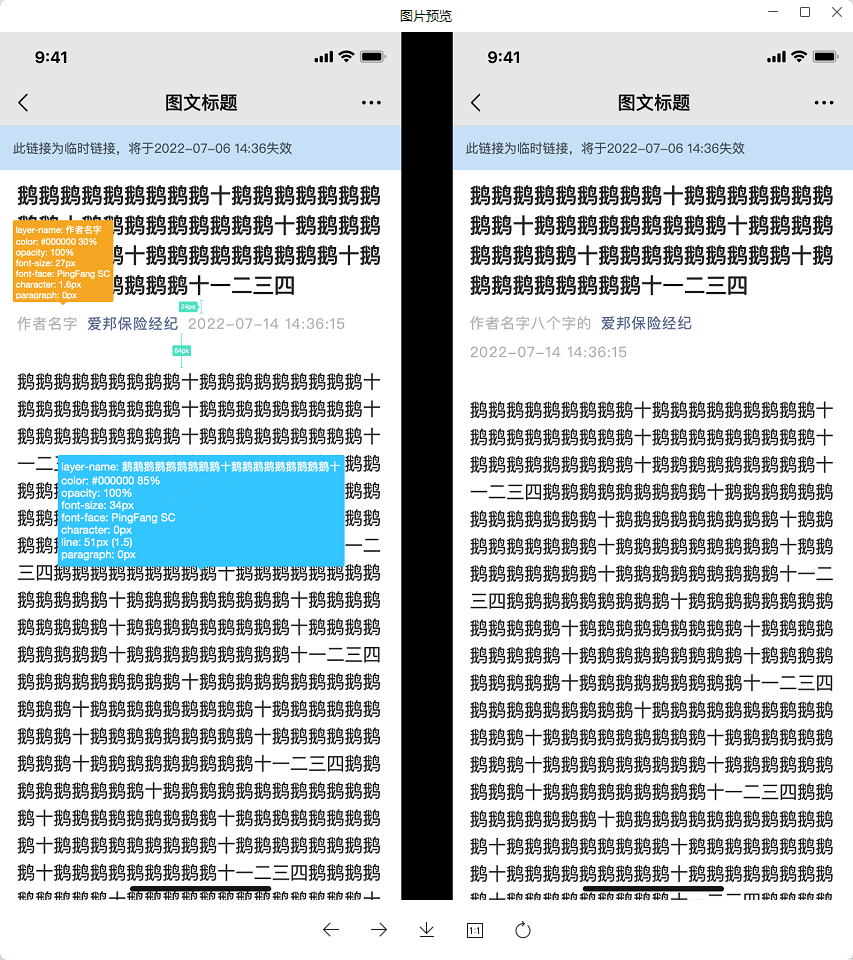
另外还有一点就是对于上图添加文章图文后,手机端的预览界面,对于作者名称和保司名称,如果字数比较少,就与后面的日期再一行显示,如果比较长的话,日期就单独一行展示.

我们可以使用flex布局来实现,将作者,保司和日期三者用一个div包裹,设置display:flex,flex-wrap:wrap即可;
 <div className="authinfo">
  <div>
    <span>{author}</span>
    <span className="com">@{corpName}</span>
  </div>
  <div>
    <span className="publish-date">{gmtModified}</span>
  </div>
</div>
div.authinfo {
    display: flex;
    flex-wrap: wrap;
    margin-bottom: 5px;
    vertical-align: middle;
    margin: 0 10px 10px 0;
    font-size: 14px;
    color: rgba(0, 0, 0, 0.45);
    span.com {
      color: rgba(94, 104, 146, 1);
      margin-left: 5px;
      margin-right: 5px;
    }
    .publish-date {
      color: rgba(0, 0, 0, 0.45);
    }
  }

Comments
请在后台配置评论类型和相关的值。